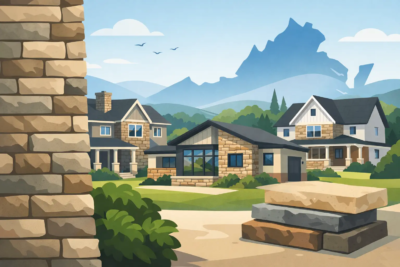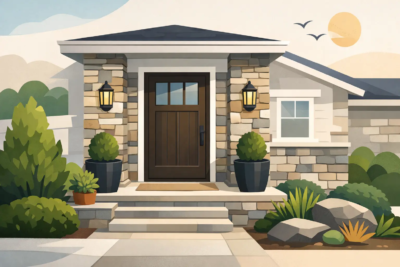

A plain window can make an otherwise handsome exterior feel unfinished. To retrofit stone around windows is to give the home more depth, stronger architectural rhythm, and a finished look that connects the façade to a chimney, foundation, entry, or column. Done well, stone window surrounds look like they belong to the home from day one. Done without a plan, they can feel oversized, disrupt drainage, or compete with every other feature on the exterior.
For Shenandoah Valley homeowners, the best approach balances regional character with the home’s existing proportions. Manufactured veneer stone makes this kind of targeted upgrade possible without rebuilding the wall, but the design and installation details still deserve careful attention.
Why Retrofit Stone Around Windows Changes a Façade
Windows are natural focal points. They repeat across the front of a home, establish symmetry, and often sit in large areas of siding, brick, or stucco that need visual relief. A stone surround frames that opening, creating shadow lines and texture where the exterior may otherwise look flat.
This is especially effective on homes with limited stone already in place. Adding veneer around select front-facing windows can tie into a stone water table, porch columns, chimney, or front entry. The result is not simply more stone. It is a more intentional exterior design.
A retrofit also allows homeowners to improve curb appeal without committing to a full façade renovation. That makes it a practical choice for a dated vinyl-sided home, a new build that needs more architectural presence, or a remodel where the windows have already been replaced.
The key is restraint. Stone around every window is not always the strongest choice. On a large home with many openings, a few prominent windows may carry the design better than matching surrounds across the entire elevation. A front gable window, grouped living room windows, or the windows nearest the entrance are often the best candidates.
Start With the Home’s Existing Stone Language
Before selecting a profile, look at what the house is already saying. A rustic farmhouse, traditional Colonial, craftsman-inspired home, and contemporary ranch each call for a different stone expression.
Field stone veneer can bring a softer, historic feel to a home with natural surroundings and traditional lines. Cut stone offers cleaner edges and a more tailored appearance, often fitting formal façades or homes with crisp trim. Ledge stone and stack stone create stronger horizontal movement, making them a natural fit for low, wide homes and more contemporary designs.
Color matters just as much as profile. The surround should relate to the roof, siding, brick, mortar, and nearby hardscape. It does not have to match every existing material exactly. In fact, an exact match can sometimes look forced. It should, however, share a compatible temperature and value. Warm tan and brown stone typically works best alongside warm siding and roofing, while gray-based profiles can complement cooler palettes and charcoal roofs.
If stone is already present on the home, using the same profile around the windows usually creates the most cohesive result. If the project introduces stone for the first time, repeat it somewhere else on the elevation. A window surround paired with a low foundation accent or front-entry detail looks more grounded than a single isolated application.
Get the Proportions Right Before Installation
The width of the stone border has a major effect on the finished appearance. Too narrow, and the feature gets lost from the street. Too wide, and the windows can appear smaller and heavy-handed. The right dimension depends on window size, wall area, stone profile, and the visual weight of the rest of the façade.
For many homes, a surround that reads clearly from the curb without dominating the trim is the goal. Larger picture windows and grouped openings can support a bolder frame. Smaller bedroom windows generally benefit from a lighter treatment or may be better left unframed while nearby focal windows receive the stone.
Consider the top of the window as carefully as the sides. A simple squared stone header can suit clean-lined homes. A keystone adds a traditional focal point and works particularly well over arched openings or formal front windows. Coordinated architectural keystones, sills, and other finishing components help the surround look designed rather than pieced together from leftover materials.
The bottom edge needs equal attention. A proper sill detail provides a clean visual stopping point and should direct water away from the wall. Avoid allowing veneer stone to crowd a window’s weep paths, drainage plane, or functional trim details.
Match the Surround to the Trim Strategy
Stone and trim can work together, but they need a clear hierarchy. Some projects use stone as the full casing around a window, replacing the visual role of wide trim. Others use a stone apron or header while retaining painted casing. Both approaches can look excellent when the materials have room to breathe.
What often causes trouble is layering too many competing elements into a tight space: wide vinyl trim, shutters, decorative headers, bulky stone, and oversized lighting all around one opening. If the window already has strong shutters or ornate trim, a simpler stone accent may be the better choice.
Protect the Wall System, Not Just the Appearance
A beautiful surround is only successful if water continues to move correctly behind and around it. Retrofit veneer work should never compromise the flashing system at the window. The installation must account for the existing wall assembly, the window’s flange or trim, and the transition from stone to adjacent siding or cladding.
Depending on the existing exterior, preparation may involve removing siding in the stone area, evaluating the substrate, installing the appropriate weather-resistive barrier, integrating flashing, and creating proper lath and mortar support where required. Manufactured veneer stone is a cladding material, not structural masonry, so it must be installed over a suitable prepared surface.
This is one reason window surrounds are not a simple glue-on weekend project. The visible stone is only one part of the work. Careful flashing and transitions help prevent moisture from finding its way behind the veneer, where problems can stay hidden until repairs become expensive.
A qualified mason or veneer installer can assess whether the existing trim should stay, be modified, or be removed. They can also determine how to handle siding cuts, corner details, sill projection, and joints between different materials. Those choices vary from house to house, especially on older homes that may have several previous renovations behind the current exterior.
Plan the Layout Before Mortar Is Mixed
Natural-looking stonework is planned, not random. Before installation, dry-lay or map the pieces so the joints are balanced and the most visible areas receive the right shapes. Corners, headers, and edges around windows deserve special attention because these are the places people notice first.
Avoid creating thin slivers of stone at the edges of the surround. It is better to adjust the layout slightly than force narrow cuts into a prominent location. Likewise, keep joint widths consistent with the chosen stone style. A rugged field stone profile can carry more variation than a refined cut stone surround.
Think about how the surrounding courses will terminate. If the stone frame meets siding, the transition should look purposeful and have enough clearance for movement and drainage. If it connects to a larger stone section, align the courses so the window surround feels integrated with the field of stone rather than pasted on top.
Choose Mortar Color With the Same Care as Stone
Mortar can either support the stone or distract from it. A light mortar tends to emphasize individual shapes and create a more traditional appearance. A darker or more blended mortar can make the overall stone field feel quieter and more contemporary.
The joint finish affects the character as well. A fuller, more rustic joint may suit field stone, while a neater finish can reinforce the crisp geometry of cut stone. Sample boards or project photos are useful here because mortar looks different after curing and at street-view distance than it does in a small hand sample.
Know When a Smaller Accent Is Better
Not every exterior calls for full surrounds on multiple windows. Sometimes a stone header above a garage window, a sill beneath a front window, or a pair of framed windows near the entry gives the home exactly the lift it needs. This approach can also make sense when budget is focused on a broader project such as a chimney remodel, entry upgrade, or foundation veneer.
Targeted accents work best when they repeat an existing visual cue. A stone header can echo a stone porch base. A framed front window can align with column cladding. A single prominent gable surround can balance a large chimney on the opposite side of the façade.
The goal is cohesion, not decoration for its own sake. When every exterior feature has a relationship to another, the house feels more complete and more valuable from the curb.
A well-planned window surround gives an ordinary opening real architectural presence. If you are considering a retrofit stone around windows project, bring photos of your exterior, measurements of the openings, and samples of nearby finishes to the conversation. Grizzly Stone can help homeowners and building professionals select a veneer profile and finishing details that make the new stone feel like a natural part of the home.