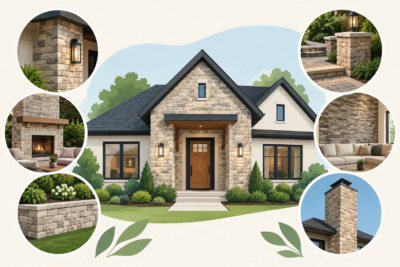

A garage door can occupy more visual space than the front entry, especially on a street-facing home. When the wall around it is plain siding or an unfinished expanse of stucco, the garage often becomes the first thing visitors notice. To install stone around garage doors successfully, treat the area as an architectural frame, not simply a patch of veneer added after the fact.
Stone veneer gives the garage elevation depth, scale, and a finished connection to the rest of the home. The best results come from planning the proportions, water management, color, and edge details before a single stone is set. That preparation is what makes the finished project look like it belongs on the house.
Start With the Right Stone Coverage
The first decision is how much stone the garage needs. A full veneer treatment across the garage wall makes a strong statement and can balance a large two- or three-car garage. It works particularly well when stone also appears on the foundation, entry columns, chimney, or another visible feature of the home.
For many Shenandoah Valley homes, a more selective application is the better choice. Stone pilasters on each side of the garage doors, a continuous wainscot across the lower wall, or a stone surround that rises partway up the opening can add character without making the façade feel heavy. The right approach depends on the home’s scale, roofline, siding color, and existing architectural details.
Avoid treating each garage door as an isolated box. On a double-door garage, for example, consider the entire wall as one composition. A stone base that stops at random points or narrow strips that crowd the door trim can make a substantial home look pieced together. Establish clear horizontal and vertical lines that relate to windows, corners, and nearby entry features.
Choose a Profile That Fits the Home
The stone profile should support the home’s architecture rather than compete with it. Field stone brings a natural, established appearance to farmhouse, traditional, and mountain-influenced homes. Ledge stone provides defined horizontal movement that suits contemporary rustic designs. Cut stone offers a more formal, tailored look, while stack stone creates a crisp, linear accent for clean modern elevations.
Color matters just as much as shape. Look at the roof, brick, siding, shutters, and garage door color together. A veneer with warm buff, brown, and gray tones may connect beautifully with weathered wood or earth-tone siding. Cooler grays can complement charcoal roofing and black windows. Bringing home samples and viewing them outdoors at different times of day is worth the effort. Morning shade and late-afternoon sun can change how a stone blend reads from the street.
Plan the Layout Before You Install Stone Around Garage Doors
A finished stone surround depends on intentional layout. Begin by marking the proposed stone boundaries and stepping back to view them from the driveway and sidewalk. Painter’s tape, kraft paper, or temporary straight boards can make the planned proportions easier to judge before materials are ordered.
Keep joints and transitions purposeful. If the stone stops below a window, align the termination with a sill or other strong architectural line when possible. If it wraps a corner, plan for the return so the veneer has visual depth. A thin strip ending right at an outside corner can look unfinished unless it is resolved with a proper corner piece.
Also account for the garage doors themselves. The stone should not interfere with tracks, weatherstripping, opener hardware, exterior lights, or decorative trim. Garage doors move, flex, and require occasional service. Leave appropriate clearance around operating components and follow the door manufacturer’s requirements. If trim needs replacement, repair or install it before the stone work begins so the veneer can terminate cleanly against a stable edge.
Use a Real Water-Management Plan
Stone veneer is a durable exterior finish, but it is not the primary weather barrier. Water management behind the veneer is essential, particularly around a broad garage opening where rain can be driven by wind and splashback is common.
The wall assembly must be appropriate for the existing substrate and local building requirements. Depending on the application, this can include a weather-resistive barrier, flashing at transitions and openings, drainage material, metal lath, a mortar scratch coat, and properly prepared masonry surfaces. Flashing needs to direct water out and away from the wall, not trap it behind stone or trim.
This is one reason garage-door surrounds deserve experienced installation. The visible stone is only part of the project. Proper integration with siding, housewrap, trim, and flashing determines whether the work performs well over time. Never cover damaged sheathing, deteriorated trim, or an unresolved leak with veneer. Correct the underlying issue first.
Prepare the Wall for Veneer Stone
Preparation varies with the surface. Clean, sound masonry may accept veneer with the correct surface preparation and bonding system. Wood-framed walls with siding require a different assembly, typically involving removal of the existing finish in the stone area and installation of compatible moisture-control layers and reinforcement.
The surface should be flat, clean, and structurally sound. Check for loose siding, cracks, rot, missing fasteners, or uneven framing before installation starts. Small problems become difficult and expensive to reach once stone is in place.
Measure carefully around door openings, light fixtures, electrical boxes, and downspouts. Order enough stone for cuts, corners, and a modest waste allowance. Veneer projects rarely use every piece exactly as it comes from the pallet. The ability to blend sizes, turn corners, and select the right face for a visible location is part of what creates a natural result.
Set the Stone With Consistent Pattern and Joints
Before setting stone in mortar, dry-lay pieces nearby and pull from several boxes or pallets at once. This prevents color concentrations and helps distribute large, small, light, and dark pieces across the wall. Start with corners and the most visible areas, then work inward.
Maintain consistent joint widths for the selected profile. Some styles are designed for tighter joints; others look best with a more traditional mortared joint. Random joint sizes, repeated shapes, or long continuous vertical seams can distract from even a beautiful stone blend. A mason will continuously adjust pieces, make cuts, and check the overall pattern rather than install one row mechanically at a time.
Use full pieces where the eye naturally lands: around the outer corners, near the top of the surround, and at prominent transitions. Save smaller cuts for less visible areas. Around garage-door openings, keep cut edges clean and make sure the termination against trim or another finish material remains straight and deliberate.
If grout is part of the chosen look, select a color that supports the stone rather than calls attention to itself. A mortar color close to the stone blend creates a quieter, more unified appearance. A contrasting joint can emphasize the pattern, but it also places more pressure on installation precision.
Finish the Surround Like an Architectural Feature
The details above and beside the garage doors often separate an adequate project from a memorable one. A substantial header treatment, coordinated keystone, or carefully selected address numbers can give the elevation a sense of permanence. Wall caps or pier caps may be appropriate when stone terminates at columns or low walls near the drive.
Consider exterior lighting at the same time. Sconces mounted against stone should be planned before installation so electrical boxes, mounting blocks, and wire paths are properly located. Fixtures that are too small disappear against a large stone wall, while oversized fixtures can crowd narrow areas between doors. The goal is a balanced composition that looks considered both day and night.
Once the veneer is complete, protect it from unnecessary damage during the remaining exterior work. Avoid leaning ladders directly against fresh stone, dragging equipment along the wall, or allowing landscaping soil to cover the bottom edge. Keep drainage moving away from the garage foundation and clean occasional dirt with gentle methods suitable for manufactured stone.
When Professional Installation Is the Better Choice
A simple stone wainscot on a sound wall may seem approachable, but garage openings introduce critical details: flashing, moving-door clearances, trim transitions, and highly visible alignment. A professional mason or qualified veneer installer can assess the wall assembly, establish a balanced layout, and deliver the clean terminations the project deserves.
For homeowners selecting materials, it helps to bring photos of the entire front elevation, not only the garage. Grizzly Stone can help match a veneer profile and coordinated finishing pieces to the home’s style, whether the goal is a modest accent or a full garage façade transformation.
The most successful garage stonework does not ask for attention through sheer quantity. It gives the home a stronger sense of place, frames an everyday feature with craftsmanship, and makes the drive home feel a little more complete.