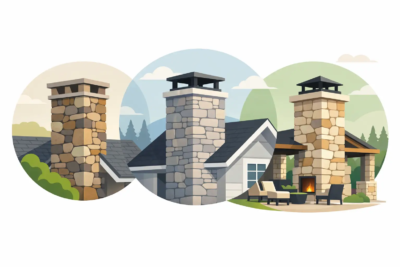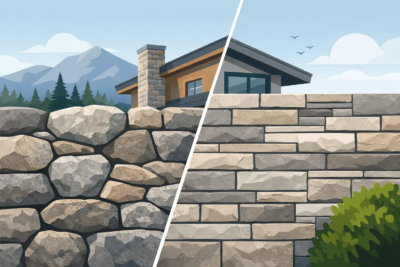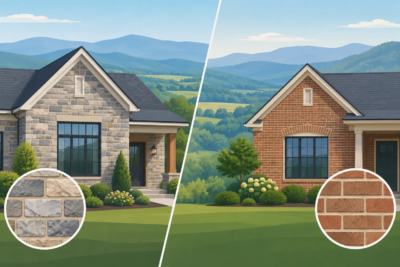

A plain front elevation can make an otherwise well-built home feel unfinished. Exterior stone wainscoting gives the lower portion of the home visual weight, protects high-traffic areas from looking ordinary, and creates a stronger connection between the foundation, entry, columns, and chimney. This guide to exterior stone wainscoting is designed to help Shenandoah Valley homeowners make choices that feel intentional from the driveway to the front door.
Stone wainscoting is not simply a strip of veneer added at the end of a project. The best results come from considering proportion, stone profile, color movement, transitions, and the architectural details around it. Whether you are planning a new build or refreshing a dated façade, those decisions determine whether the stone looks like a natural part of the home.
What Exterior Stone Wainscoting Does for a Home
Exterior wainscoting is veneer stone applied along the lower section of an exterior wall. It is commonly used on front façades, foundations, bump-outs, entry walls, porches, garages, and columns. In many designs, it rises from grade to the bottom of the first-floor windows or to a defined horizontal trim line.
Its visual job is straightforward: it grounds the structure. Siding, stucco, and lap board can make a tall wall feel broad or flat. A well-proportioned stone base adds texture and shadow at eye level while giving the house a more substantial presence. On a renovation, it can also redirect attention away from an aging foundation or a front elevation with limited architectural detail.
For Virginia homes, stone wainscoting often works especially well with Craftsman, farmhouse, traditional, colonial-inspired, and mountain-influenced architecture. The stone does not need to cover every wall to make an impact. Selective placement usually creates a more refined result than using it everywhere.
Choose a Height That Fits the Elevation
Height is one of the first decisions to make, and one of the easiest places to go wrong. A wainscot that is too short can appear like an afterthought. One that rises too high can overwhelm windows, porch rails, or siding and make the home feel bottom-heavy.
On many homes, a height of roughly 24 to 36 inches works well across a foundation wall. A taller application may be appropriate on a large front gable, a deep porch wall, or a broad garage elevation. The important factor is not a universal measurement but the relationship between the stone line and the features above it.
Look closely at window sills, porch floors, trim bands, and door thresholds. A strong design gives the stone a logical stopping point. For example, aligning the top of the wainscoting with the bottom of a window sill can make the entire elevation feel measured and deliberate. If the line must stop below a window, a substantial cap or trim course can help create a clean finish.
On sloped lots, keep the top line level whenever possible. Let the stone adjust near grade rather than allowing the wainscot to follow every contour of the ground. A level line reads as architecture; a wandering line can make the installation feel improvised.
Think Beyond the Front Wall
The front façade deserves attention, but side returns matter. Stone should wrap around corners far enough that it does not look like a thin decorative panel applied only for curb appeal. How far it wraps depends on the home and budget, yet a thoughtful return around visible corners creates a much more convincing finish.
Garages, foundation bump-outs, porch bases, and chimney masses can also carry the design around the property. Repeating the same stone in these areas establishes continuity without making every surface identical.
Select a Stone Profile for the Architecture
Manufactured veneer stone offers a wide range of looks, from rugged fieldstone to clean-cut linear profiles. The right choice should support the architecture rather than compete with it.
Field stone has irregular shapes and varied face sizes that create a traditional, natural appearance. It suits homes with a relaxed, regional character, especially properties with wood accents, deep porches, and mature landscaping. Ledge stone tends to feel more horizontal and layered, making it a strong choice for Craftsman details, low foundation walls, and broad chimneys.
Cut stone presents a more tailored appearance with defined edges and a classic masonry feel. It can complement formal traditional homes, painted brick, and crisp trim. Stack stone brings a tighter, more contemporary linear texture and is often effective on entry features, columns, and accent walls where a cleaner profile is desired.
Scale matters as much as style. Large stone faces on a small ranch home can feel oversized, while a very fine profile may disappear on a two-story façade with wide gables. Bring the stone selection into the context of the whole elevation: roof pitch, siding width, window trim, porch posts, and lot size all affect how it will read from the street.
Build a Color Palette, Not a Patchwork
Stone color should relate to the permanent materials already on the home. Start with the roof, because it is usually the largest color field and the most difficult material to change. Then consider siding or brick, shutters, door color, mortar tone, and surrounding landscape.
A warm gray or soft brown stone can bridge a charcoal roof and neutral siding. Buff, tan, and weathered brown tones often work naturally with earth-toned exteriors and wooded Shenandoah Valley settings. For a sharper contrast, a darker stone base beneath light siding can give a home a more defined, tailored appearance.
Avoid choosing solely from a small sample viewed indoors. Manufactured stone has color variation by design, and exterior light changes throughout the day. Look at full-size panels or installed examples when possible. The goal is coordinated variation, not a color match so exact that the materials appear flat.
Mortar is part of the palette, too. A lighter mortar can emphasize each stone shape, while a deeper mortar can create a quieter, more blended look. Joint treatment should fit the profile and the desired level of definition.
Finish the Top Edge and Corners Properly
The transition at the top of the stone is where quality becomes visible. A finished edge may use a sill, ledge, soldier course, trim board, or another architectural break that suits the design. Without a deliberate transition, the stone can seem abruptly cut off beneath the siding.
Caps are especially useful on porch walls, landscape walls, and freestanding piers. They provide a completed look while shedding water away from the veneer. Coordinated pier caps, wall caps, and keystones can tie a front entry together when used with restraint.
Corners require equal care. Veneer should turn corners with matching corner pieces rather than stopping at the edge of a wall. This gives the installation depth and makes the stone appear built into the structure. On columns, use proportions that preserve the column’s shape instead of turning it into a bulky stone box.
House numbers are another small but meaningful detail. Architectural stone numbers or a well-placed address plaque can finish an entry feature without introducing a competing style.
Plan for Water Management and Skilled Installation
Exterior stone veneer is durable, but it is only as dependable as the wall assembly behind it. Proper installation includes a suitable substrate, weather-resistive barrier, flashing, drainage considerations, correctly installed lath where required, and mortar work appropriate to the selected veneer. Details around windows, doors, roof intersections, and grade are particularly important because water must be directed out and away from the wall.
This is not the place to treat materials as interchangeable. Existing masonry, framed walls, concrete foundations, and insulated wall systems can require different preparation. Local conditions also matter. Freeze-thaw cycles, driving rain, soil grade, and exposure on an open lot all influence the installation approach.
Before ordering stone, confirm the scope with the installer and supplier. Discuss the finished height, square footage, corners, trim pieces, caps, waste allowance, and any areas where stone meets another cladding. A clear estimate helps prevent the common problem of selecting a beautiful profile without enough matching accessories to complete the project correctly.
Use Wainscoting to Create a Cohesive Exterior
The strongest exterior updates repeat a few materials in the right places. If stone wainscoting anchors the front façade, consider carrying it onto porch bases, a chimney, a low retaining wall, or entry piers. These applications do not need to be identical in size, but they should share the same visual language.
Grizzly Stone helps homeowners and building professionals select manufactured veneer profiles and finishing components that work together, from the first wall section to the final cap. That coordination is what turns a material choice into an exterior with lasting character.
Take a few steps into the street before finalizing your plan. If the stone base, roof, trim, entry, and landscape read as one composed home rather than separate upgrades, the design is on the right track.