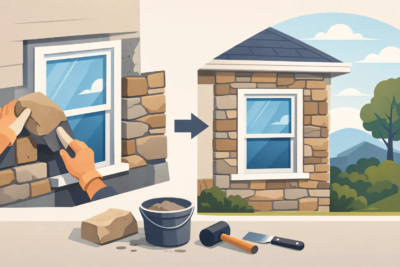

A dated run of vinyl siding can make an otherwise well-kept home feel unfinished, especially around an entry, foundation, chimney, or front-facing gable. So, can stone veneer cover siding? Usually, stone veneer should not be installed directly over existing siding. The siding often needs to come off so the new stone system can be attached to a sound, properly protected wall.
That answer may feel less convenient than applying stone over what is already there, but it protects the investment. Manufactured stone veneer is a finish system, not a cover that can hide every problem beneath it. Its long-term appearance depends on the wall behind it, the moisture barrier, the flashing, the lath, and the mortar work being done correctly.
Can Stone Veneer Cover Siding Without Removal?
There are limited situations where an existing exterior surface can remain, but standard residential siding is rarely the right substrate. Vinyl siding flexes, has a contoured profile, and is not designed to carry adhered stone. Wood siding may be weathered, uneven, or hiding water damage. Even fiber-cement siding, while durable, is generally not the installation surface an adhered manufactured stone system is designed around.
Removing the siding in the proposed stone area gives the installer a clear look at the sheathing and framing. It also allows the wall to be rebuilt as a complete veneer assembly, with the correct water-resistive barrier, flashing details, metal lath where required, and mortar bed.
This is particularly valuable on Shenandoah Valley homes, where wind-driven rain, seasonal temperature swings, and freeze-thaw cycles can expose weak details over time. A beautiful stone façade is only as dependable as the water management behind it.
When an Existing Surface May Be Usable
A solid masonry wall, such as properly prepared brick, block, or poured concrete, may be an appropriate base for manufactured stone veneer. The surface still needs evaluation. It must be clean, stable, and free of failing paint, loose mortar, moisture issues, or coatings that prevent a secure bond.
Some specialty wall assemblies may also allow stone installation over an existing surface when the veneer manufacturer’s instructions and local building requirements support that approach. That is a project-specific decision, not a shortcut to assume. An experienced mason or installer should confirm the wall construction before materials are ordered.
Why Removing Siding Is Usually the Better Choice
Taking off siding is not simply a matter of making room for stone. It gives the project a proper starting point.
First, it creates a flat, reliable plane. Stone veneer needs a consistent surface to prevent irregular mortar thickness, uneven courses, and visible transitions. Siding profiles and trim details can make that difficult, even when the wall looks fairly straight from the ground.
Second, removal makes it possible to install flashing where stone begins and ends. A stone wainscot, chimney surround, or gable accent has edges that must direct water back to the exterior. Without properly integrated flashing, water can slip behind the veneer and remain trapped against the wall.
Third, it reveals hidden conditions. Rotten sheathing, insect damage, missing housewrap, and poorly sealed windows are much easier to correct before stone is installed. Covering those issues may make the wall look better for a while, but it does not make the home better.
Finally, removing the existing siding helps manage thickness. Manufactured stone veneer adds depth to the wall. That added thickness affects windows, doors, corners, exterior outlets, downspouts, and trim. Planning those transitions from the sheathing outward creates a cleaner, more intentional result.
What a Proper Stone Veneer Wall Assembly Includes
The exact installation process depends on the wall type, product, and application, but a sound exterior stone project generally moves from structure to finish in a deliberate order.
After siding is removed, the installer inspects the sheathing and repairs any damaged areas. A water-resistive barrier is installed or restored, with special attention around windows, doors, roof intersections, and penetrations. Flashing is integrated so water drains outward rather than behind the stone.
For many framed-wall installations, corrosion-resistant metal lath is secured over the protected wall and covered with a scratch coat. The stone is then set in mortar, with joints finished to suit the selected profile and desired architectural character. Some systems use different approved methods, which is why product-specific installation guidance matters.
The visible stone is the final layer of a carefully planned wall. Skipping the layers behind it can lead to cracking, staining, loose pieces, or moisture damage that may not become apparent until years later.
Plan the Edges Before Choosing the Stone
Homeowners often start with color and profile, which is understandable. Field stone, ledge stone, cut stone, and stack stone each create a distinct look. Yet the best projects also consider how the stone begins, ends, and connects with the rest of the home.
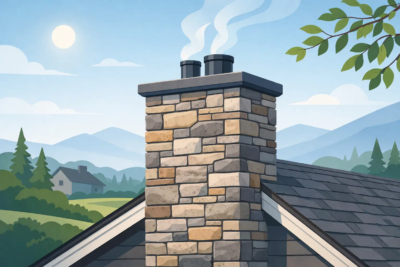
A stone wainscot needs a thoughtful cap or transition at the top. A front entry may need coordinated corners and a clean relationship with the porch columns. A chimney remodel needs attention at the roofline and where flashing meets the veneer. For a foundation treatment, the grade and drainage around the house matter as much as the stone color.
Finishing pieces bring these details together. Matching wall caps, pier caps, keystones, and even architectural house numbers can make an addition look designed with the home rather than added after the fact. That is often the difference between a small update and a true curb-appeal transformation.
Consider the Weight and the Wall Location
Manufactured veneer stone is substantially lighter than full-bed natural stone, but it still adds weight to the wall. The supporting structure and the fastening method must be suitable for the installation. This becomes especially relevant on tall gables, large chimney chases, and expansive exterior accent walls.
Location also changes the answer. Covering a small section of siding around a front door is a different undertaking from converting an entire two-story façade. Larger applications require more attention to wall movement, drainage planes, flashing, scaffolding, and coordinated trim work. A careful estimate should account for those realities before a project begins.
Common Shortcuts That Create Problems
The most costly stone veneer mistakes are often hidden at first. Installing directly over vinyl siding can leave the veneer unsupported and make moisture control nearly impossible. Fastening lath through siding without verifying the structure below can compromise the wall plane. Extending stone too close to grade or failing to maintain proper clearance can expose the veneer to excessive moisture and splashback.
Another common issue is treating transitions as an afterthought. If a window trim, porch post, or exterior receptacle sits proud of the proposed stone thickness, the detail needs a plan. Trying to solve it after stone has been set can produce awkward cuts and visible patchwork.
The right approach is not necessarily the most complicated one. It is the one that respects the existing house, the selected stone profile, and the way water moves around the wall.
Choosing a Look That Belongs on Your Home
Once the wall is properly prepared, stone veneer gives homeowners remarkable freedom. A warm field stone can soften a traditional Virginia home. Clean-cut ledge stone can sharpen the lines of a newer build. Stack stone can add texture to a fireplace, column, or covered porch without overwhelming the rest of the exterior.
For the strongest result, repeat a few design cues rather than covering every available surface. A front foundation accent paired with stone porch columns, or a chimney treatment echoed at the entry, can give the entire property a cohesive appearance. Grizzly Stone helps homeowners and building professionals select custom-made veneer profiles and finishing details that fit both the project and the home’s character.
Before covering any siding, start with the wall itself. A careful inspection and a well-planned installation create the foundation for stonework that looks settled, intentional, and beautiful for years to come.