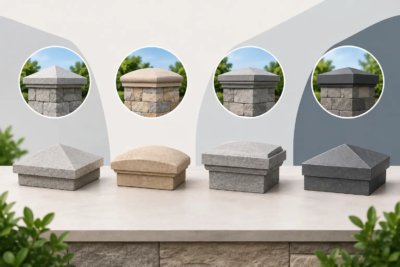

A well-built stone veneer chimney, entry, or accent wall should look like a permanent part of your home, not a finish that needs constant attention. The good news is that manufactured stone veneer is low-maintenance by design. This stone veneer maintenance guide explains how to preserve its color, texture, and clean finished appearance without using harsh methods that can damage the surface or mortar.
For Shenandoah Valley homeowners, the main concerns tend to be seasonal moisture, windblown dirt, pollen, shaded areas that stay damp, and the occasional hard freeze. A little routine attention goes a long way – especially on highly visible features such as front façades, columns, chimneys, foundation accents, and outdoor kitchens.
Start With the Right Expectation
Stone veneer is made to withstand everyday exposure, but it is not maintenance-free in the literal sense. Dirt settles into texture. Rain can leave mineral deposits. Landscaping can hold moisture against the wall. These conditions do not mean the veneer is failing. Most can be handled with a gentle cleaning and a close look at the surrounding drainage, flashing, or vegetation.
The goal is not to make stone look brand-new after every season. Natural-looking variation is part of its character. Instead, maintain the wall so it stays sound, clean enough to show its intended color, and properly protected from water getting behind the veneer.
Interior stone generally needs little more than occasional dust removal. Exterior installations deserve a spring and fall inspection, plus a check after major storms or extended freezing weather.
Stone Veneer Maintenance Guide: Routine Cleaning
For ordinary dust, pollen, and light surface soil, begin with the least aggressive method. Use a garden hose with a gentle spray, working from the top of the wall down. This prevents dirty water from running over areas you have already cleaned. On an interior wall, a soft brush attachment on a vacuum or a dry microfiber cloth is usually enough.
If the stone needs more attention, mix a small amount of mild detergent with clean water. Wet the veneer first, then use a soft-bristle brush to loosen dirt. Work in manageable sections and rinse thoroughly before moving on. A nylon brush is appropriate for textured surfaces; wire brushes are not.
Avoid blasting the wall with a pressure washer. High pressure can drive water into mortar joints and behind the veneer, particularly around corners, windows, caps, and transitions. It can also wear at the mortar or leave an unevenly cleaned appearance. If a professional recommends pressure washing for a specific condition, they should use low pressure, the correct nozzle distance, and methods suited to manufactured veneer.
Do not use acids, bleach, muriatic acid, paint thinner, or abrasive cleaners as a general cleaning solution. These products can discolor stone, weaken mortar, harm nearby plants, and create a more serious problem than the stain itself. A product that works on concrete, brick, or a patio may not be appropriate for your veneer.
Treat stains by identifying the source
A dark streak beneath a gutter or cap is often a water-management issue, not a cleaning issue. Before scrubbing it repeatedly, look for an overflowing gutter, a missing drip edge, or runoff striking the same area of the wall. Correcting the source protects the veneer and reduces future staining.
White, powdery residue may be efflorescence – mineral salts left behind as moisture evaporates. Light efflorescence can often be brushed away once the wall is dry. Persistent residue points to excess moisture, so inspect the area for drainage or flashing concerns rather than relying on a chemical cleaner.
Rust-colored staining may come from metal fixtures, irrigation water, or nearby hardware. Organic marks from leaves, algae, or mildew are common on shaded walls where shrubs and mulch keep the surface damp. Gentle cleaning may improve the appearance, but better airflow and less moisture contact are the lasting fix.
For paint, mortar smears, deep rust, or unknown staining, stop before experimenting. A mason or veneer professional can recommend a compatible treatment after identifying the material and the cause. This is especially worthwhile on a prominent front elevation where an aggressive cleaning attempt can leave a permanent mark.
Inspect Mortar, Flashing, and Drainage
The stone is only one part of the assembly. Long-term performance depends on the mortar, water-resistive barrier, flashing, weep details, and substrate installed behind it. Homeowners cannot see most of those layers, but regular visual inspections can reveal early warning signs.
Walk around exterior stone features twice each year. Look for loose or cracked mortar, stones that appear to shift, gaps around windows and doors, damaged sealant at transitions, or water stains beneath caps. Pay special attention to chimneys, foundation areas, retaining features, columns, and walls near roof runoff. These locations receive more water exposure and more freeze-thaw stress than a protected entry wall.
A single hairline line in mortar is not always an emergency. Homes settle, materials expand and contract, and minor cosmetic cracking can occur. It becomes more concerning when cracks widen, repeat in the same location, follow a stair-step pattern, or allow water into the wall. Likewise, one loose stone deserves prompt repair before water finds its way behind the veneer.
Check that gutters are clear and downspouts discharge away from the home. Soil and mulch should not be piled against stone veneer, particularly near the foundation. Maintain a visible gap where practical so moisture does not stay trapped against the wall. If irrigation regularly sprays the stone, adjust the heads to water plants rather than the house.
Protect caps and horizontal surfaces
Wall caps, pier caps, window sills, and other horizontal details require special attention because they shed water over the face of the veneer. Keep these surfaces clear of wet leaves, soil, and planters that can hold moisture. Inspect joints and sealant where caps meet adjacent building materials.
A cap that is cracked, loose, or improperly sloped can send water into areas it was designed to protect. Addressing that small detail early is far simpler than repairing damage behind a finished stone wall.
Be Careful With Sealers
Many manufactured stone veneer installations do not require a sealer. When the wall was properly installed and drains as intended, routine cleaning and moisture control are usually more valuable than adding a coating.
There are situations where a breathable, compatible sealer may be considered, such as a heavily exposed outdoor feature or an area prone to repeated staining. The decision depends on the stone profile, location, exposure, and the product used. A sealer can slightly change color or sheen, and an unsuitable non-breathable coating may trap moisture where it should be able to escape.
Never apply a sealer simply because the stone looks dusty or weathered. Clean the wall first, allow it to dry completely, and consult a qualified installer or manufacturer guidance before choosing a product. Test any approved treatment in an inconspicuous area to confirm the finished appearance.
Seasonal Care in the Shenandoah Valley
Spring is an ideal time to rinse away pollen, clear roof debris, and inspect the veneer after winter. Look closely at chimney shoulders, entry columns, and lower foundation courses where snow, mulch, and wet leaves may have collected.
Summer care centers on vegetation and irrigation. Trim back vines, shrubs, and climbing plants so air can move around the stone. Roots and branches should not press against mortar joints, while sprinklers should not soak the same section of wall every day.
In fall, remove leaf buildup from caps, ledges, and the base of exterior walls. Clear gutters before winter rains arrive. Winter inspections can be brief but useful after a hard freeze or ice event, particularly if melting snow has drained across the veneer from a roofline, step, or landscape bed.
Avoid using de-icing salts directly against stone veneer, steps, or adjacent masonry. Salt can contribute to surface staining and deterioration over time. Use traction materials thoughtfully and keep chemical de-icers away from the wall whenever possible.
When to Call a Professional
Cleaning is a homeowner task; diagnosing movement or moisture intrusion is not always one. Contact a qualified masonry or veneer professional if stones are loose, mortar is breaking away, water is appearing indoors near a stone feature, or staining continues after the likely source has been corrected.
Also seek guidance before mounting heavy items through veneer, adding new exterior fixtures, or modifying a wall around a fireplace, chimney, or outdoor kitchen. Fasteners and penetrations need to be planned carefully so they do not compromise the finished surface or water-management details.
Grizzly Stone works with homeowners and construction professionals who want stone features that feel considered from the fieldstone or ledge profile to the matching caps, keystones, and finishing details. Maintaining that investment starts with respecting how the wall was built and responding early when water or movement leaves a clue.
A stone feature earns its place on a home over time. Keep it clear of trapped moisture, clean it gently, and give small changes your attention before they become repairs. That simple approach lets the craftsmanship remain what people notice first.