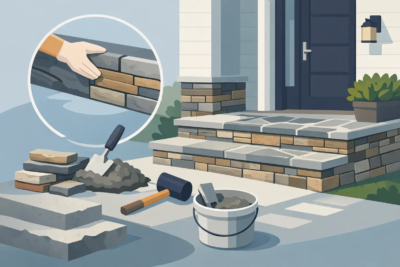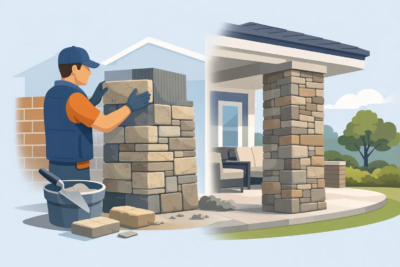

A new stone veneer chimney or accent wall should look like stone, not like it has been coated in plastic. That is the central rule when learning how to seal manufactured stone. The right sealer can help protect a finished surface from moisture, stains, and weather exposure. The wrong product, or a rushed application, can leave behind dark patches, gloss, residue, or a film that changes the character of the stone.
For Shenandoah Valley homeowners, the decision often comes down to location. A dry interior feature wall may not need sealing at all. An exterior chimney, column, entry surround, or low foundation wall exposed to rain, splashback, pollen, and freeze-thaw cycles may benefit from carefully selected protection. The goal is to preserve the color and texture that made you choose manufactured stone in the first place.
First, Decide Whether Your Stone Needs Sealing
Manufactured stone veneer is a concrete-based product made to resemble natural stone. It is durable, but it is also porous. Moisture and contaminants can enter that surface, particularly in high-exposure locations. A breathable, penetrating sealer can reduce absorption without creating a visible coating.
That does not mean every installation should be sealed. Interior manufactured stone away from sinks, fireplaces, and heavy traffic commonly performs well without it. Applying sealer simply because the wall is new can add cost and create an unnecessary maintenance item.
Sealing is more useful where the veneer faces repeated moisture or staining. Consider it for exterior walls exposed to driving rain, chimney bases, outdoor kitchens, low stonework near mulch beds, or entry columns where irrigation and road grime are common. It can also make sense for an interior hearth or kitchen accent that may be exposed to grease, soot, or splashes.
Before purchasing anything, confirm the veneer manufacturer’s recommendations. Some products, colors, and installation systems have specific requirements. A sealer should never substitute for proper flashing, drainage, mortar work, or water management behind the veneer. If water is getting into a wall assembly, sealing the face of the stone is not the fix.
Choose a Sealer Made for Manufactured Stone
The best choice for most veneer applications is a breathable, penetrating masonry sealer. Look for a product specifically labeled for manufactured stone, concrete masonry, or porous masonry veneer. These sealers soak into the surface rather than forming a thick layer on top.
A penetrating sealer is usually preferred because it maintains the natural matte appearance of the stone and lets water vapor move outward. That breathability matters on exterior veneer. Trapping moisture behind a film-forming coating can contribute to whitening, peeling, or uneven discoloration over time.
Water-based sealers are often easier to apply and have a lower odor, making them a practical option for many residential projects. Solvent-based products may penetrate deeply and can be useful in demanding exterior conditions, but they require more careful handling and ventilation. In either case, follow the label for temperature limits, surface preparation, and cure time.
Avoid high-gloss sealers unless a deliberate wet-look finish is part of the design plan. On a traditional field stone, ledge stone, or stack stone profile, a glossy surface can make a carefully crafted wall look artificial. Enhanced-color sealers are also a design decision, not a default. They may deepen the stone’s color permanently, so test first and view the sample in the same light as the finished installation.
How to Seal Manufactured Stone Step by Step
Sealer performs only as well as the surface beneath it. Plan the work for a dry stretch of weather and allow enough time for the veneer to dry fully after cleaning. For exterior projects, avoid applying sealer in direct hot sun, during rain, or when temperatures are outside the product’s recommended range.
Let New Veneer Cure Completely
Freshly installed manufactured stone and mortar need time to cure before sealing. The exact wait period depends on the product, installation conditions, and sealer instructions, but 28 days is a common baseline for cement-based work. Sealing too soon can lock in construction moisture and lead to a blotchy finish.
If the project was completed during a wet Virginia season, give it extra time. A wall can feel dry on the surface while moisture remains in mortar joints or behind the veneer.
Clean Without Damaging the Surface
Remove dust, mud, cobwebs, pollen, and any construction residue before sealing. Start with a soft brush and clean water. For more persistent dirt, use a masonry cleaner approved for manufactured stone and follow its dilution instructions closely.
Do not use muriatic acid, harsh acidic cleaners, wire brushes, or aggressive pressure washing. Manufactured stone has a textured face and colored surface that can be damaged by harsh methods. High-pressure water can also force moisture into joints and behind the veneer. If efflorescence, rust staining, or mortar haze is present, address the specific issue with an appropriate product before sealing.
After cleaning, rinse thoroughly and let the wall dry completely. This is not a step to rush. Applying sealer to damp stone can prevent even penetration and leave cloudy or darkened areas.
Protect Nearby Materials and Test a Small Area
Mask windows, doors, trim, metal, landscaping, and adjacent siding. Sealer can leave marks on glass and finished surfaces, and overspray is harder to correct than it is to prevent.
Then test the sealer on an inconspicuous section of stone. Apply it exactly as you plan to apply it across the project. Let it cure, then inspect it in daylight and after the surface has been wet. Look for unwanted darkening, sheen, streaking, or changes in the mortar color. This small test is especially valuable with light-colored stone or highly textured profiles.
Apply Thin, Even Coats
Use the application method recommended by the sealer manufacturer. A pump sprayer is common for broad exterior walls, while a brush can help work product into irregular faces and mortar joints. For interior accents or small details, a brush or low-nap roller may offer better control.
Work from the top down in manageable sections, keeping a wet edge so one area does not dry before the next is treated. Apply enough material for the stone to absorb it, but do not flood the surface. Puddling is a warning sign that too much product is being used.
Many penetrating sealers are applied in one saturated coat or two light coats. If a second coat is required, apply it within the manufacturer’s stated recoat window. Do not assume more coats equal more protection. Overapplication can leave a sticky residue or visible film on the face of the veneer.
Remove Excess and Allow Full Cure Time
After application, inspect the stone for drips, pools, or glossy spots. Wipe excess sealer before it dries, using the method specified on the label. Pay close attention to horizontal ledges, deep crevices, and the bottoms of irregular stone pieces where product can collect.
Keep the area dry and protected from traffic until the sealer has cured. Cure times vary, but the surface may need 24 to 72 hours before normal weather exposure or cleaning. If the project is an entry feature, plan around rain and foot traffic rather than treating the work as a quick afternoon task.
Common Problems to Avoid When Sealing Stone Veneer
The most common mistake is sealing a wall to solve a moisture problem that begins elsewhere. Check gutters, downspouts, roof flashing, grade, irrigation, and the clearance between soil or mulch and the bottom of the veneer. Water should be directed away from the house, not repeatedly driven against a stone surface.
Another mistake is using a generic concrete coating. A product that works on a garage floor may be completely wrong for vertical manufactured stone. The veneer needs a breathable masonry sealer, not a heavy topical barrier.
Finally, do not overlook appearance. Stone veneer is chosen for depth, texture, and regional character. Whether you are finishing a chimney remodel in Harrisonburg, refreshing an entry in Staunton, or adding stone columns to a new home near Charlottesville, protection should be nearly invisible. If the wall suddenly looks shiny or noticeably darker, the sealer is working against the design.
How Often Should Manufactured Stone Be Resealed?
There is no single schedule for every project. Exterior stone exposed to frequent rain, direct sun, sprinklers, and winter weather may need attention every three to five years. A protected wall may go much longer. Interior veneer may never need resealing unless its use changes or stains become a concern.
A simple water test can help. Sprinkle a small amount of water on a clean, dry, inconspicuous area. If it beads and remains near the surface for several minutes, the existing sealer is likely still providing protection. If it darkens the stone quickly and absorbs readily, it may be time to clean, dry, and reseal.
Good stonework starts with the right profile and ends with details that respect the finished surface. When a veneer project needs protection, use a breathable sealer, prepare patiently, and test before committing to the full wall. That careful approach keeps the stone looking like a lasting part of a beautiful home, not a surface hidden beneath a coating.