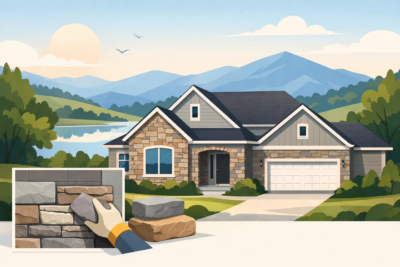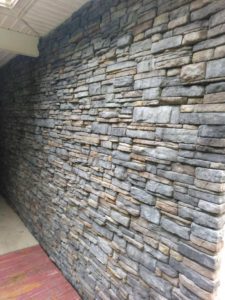

A finished stone façade should feel as solid as it looks, but stone veneer insulation is not as simple as placing insulation behind a beautiful wall finish. Manufactured stone veneer delivers the color, texture, and architectural presence that can transform a chimney, foundation, entry, or full exterior. The wall assembly behind it determines how comfortably and reliably that beauty performs through Virginia summers, winter cold, wind-driven rain, and changing temperatures.
For homeowners planning a new build or exterior remodel, the key question is usually not whether stone veneer itself insulates. It is where insulation, drainage, air control, and stone each belong in the wall. Getting those layers right protects the investment in your home while helping create a finished exterior that looks intentional from every angle.
Stone Veneer Adds Beauty, Not Significant R-Value
Manufactured stone veneer has some thermal mass, but it is not a substitute for the insulation required in an exterior wall. Its primary role is architectural: it gives a home the character of field stone, ledge stone, cut stone, or stack stone without the weight and depth of full-bed natural stone.
The insulation that helps regulate indoor temperature is typically located within the framed wall cavity, as continuous insulation on the exterior sheathing, or in a combination of both. A properly planned assembly can make a noticeable difference in comfort near exterior walls, heating and cooling costs, and the long-term health of the structure.
That distinction matters when comparing project costs. A homeowner may choose stone for a front elevation, a chimney remodel, or foundation facing because it creates immediate curb appeal. The insulation strategy should be evaluated separately, then coordinated with the veneer installation so one system does not compromise the other.
What Goes Behind Stone Veneer?
A stone veneer wall is a layered system, not simply stone applied over a wall. While the precise assembly depends on whether the home has wood framing, masonry, concrete block, or another substrate, the basic purpose of each layer remains the same: manage water, reduce air leakage, provide insulation, and create a sound surface for the veneer.
On a typical framed exterior wall, insulation may sit between studs or be added as a continuous layer outside the sheathing. Over the exterior wall, installers use a weather-resistive barrier and drainage plane designed for adhered manufactured stone veneer. Metal lath and mortar provide the base that holds the stone in place, with flashing and weep details helping direct incidental moisture back out of the wall.
Those details are not decorative extras. Veneer stone is installed on the outside of a home, where rain and moisture exposure are unavoidable. The wall needs a path to shed water rather than trap it behind the finished stone. A dependable installation considers the transition around windows, doors, roof intersections, chimneys, decks, and changes in material.
The Role of the Drainage Space
A drainage space behind adhered stone veneer gives moisture a route to escape. It also helps separate the masonry-facing materials from the weather-resistive barrier. Without thoughtful drainage and flashing, even an attractive stone wall can become a source of hidden moisture problems.
This is especially relevant in the Shenandoah Valley, where homes experience heavy rain, freezing temperatures, humid stretches, and seasonal temperature swings. The right wall design helps manage those conditions without asking the stone itself to do work it was never intended to do.
Continuous Insulation Requires Coordination
Exterior continuous insulation can improve energy performance by reducing thermal bridging through wood studs. It can be a smart choice for a new home or a major remodel where siding, sheathing, and exterior finishes are already being replaced.
However, adding rigid insulation outside the sheathing changes the depth and attachment details of the wall. Veneer, lath, flashing, window trim, and architectural accents must all be designed around that added thickness. This is not a reason to avoid continuous insulation. It is a reason to plan it before stone selection and installation begin.
An experienced builder, mason, and insulation contractor should work from the same wall details. When decisions are made in isolation, the project can end up with awkward transitions, improperly integrated flashing, or costly adjustments after materials arrive.
Choosing the Right Insulation Strategy
The best insulation approach depends on the home, the scope of the project, and the condition of the existing wall. A new construction project gives the most flexibility because the entire assembly can be designed from framing outward. A renovation may be more limited, particularly if the interior drywall is staying in place or only one portion of the exterior is being updated.
For a simple chimney refacing or a new stone accent wall, the existing wall insulation may remain untouched. The focus is then on a proper veneer substrate, weather protection, and clean transitions to nearby siding, trim, or roofing.
For a larger exterior renovation, it may make sense to assess insulation before the new façade goes on. If old siding is being removed and the sheathing is exposed, this can be an efficient time to address damaged materials, air leaks, missing insulation, or inadequate flashing. The right time to improve a wall is before the finished stone makes it harder to access.
Homes in higher elevations or colder pockets of western Virginia may have different performance needs than homes in milder areas. Local building code requirements, the age of the home, HVAC performance, and the homeowner’s comfort goals all matter. There is no one insulation thickness or product that fits every stone veneer project.
Common Missteps to Avoid
The most expensive problems usually begin when stone is treated as a stand-alone surface rather than part of a complete exterior system. Applying veneer over a poorly prepared wall can leave moisture details hidden behind an otherwise beautiful finish. Choosing insulation without accounting for wall depth can create trouble at windows, doors, corners, and foundation transitions.
Another common mistake is assuming a stone-covered area does not need air sealing because it feels substantial. Air leakage occurs at seams, penetrations, framing connections, and openings behind the veneer. Insulation slows heat transfer, while air sealing limits uncontrolled air movement. A comfortable, durable wall generally needs both.
It is also wise to avoid mismatched finishing details. Stone that stops abruptly at a corner, doorway, or wall cap can make even a well-installed project look incomplete. Coordinated caps, keystones, address numbers, and carefully selected transition materials give the wall a deliberate architectural finish.
Design Stone Veneer as Part of the Whole Home
Stone is often chosen for the most visible areas of a home: the front façade, porch columns, fireplace, entry surround, chimney, or foundation. These features should relate to the home’s roof color, siding, trim, landscaping, and existing architectural lines. Insulation and moisture management may be hidden, but they influence how well those visible improvements endure.
For example, a new stone chimney surround should include careful flashing at roof and wall intersections. A foundation veneer should be planned with grade clearance, drainage, and transitions to adjacent materials in mind. An entry feature may need a coordinated cap or keystone to make the design feel complete rather than added on.
Grizzly Stone helps homeowners and building professionals select manufactured stone profiles and finishing components that fit the character of the property. The strongest projects pair that material selection with a wall assembly designed to perform as well as it looks.
A Better Starting Point for Your Project
Before choosing a stone color or profile, ask what is behind the area you plan to cover. Is the wall framed or masonry? Will existing siding come off? Are there signs of drafts, water staining, damaged sheathing, or failing trim? Will new windows, roofing, or gutters be part of the same project?
Those answers shape the correct approach to stone veneer insulation, drainage, and installation details. They also help prevent a visual upgrade from becoming a repair project later. A well-planned stone wall does more than elevate curb appeal – it gives your home a finished exterior built with the care it deserves.