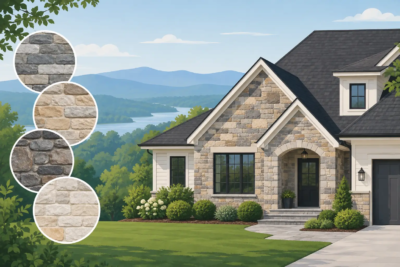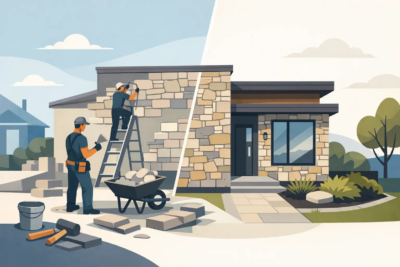

A stone veneer project can transform a plain front elevation, dated chimney, or unfinished foundation into one of the strongest features of the home. But the best results are decided well before installation begins. Thoughtful veneer project planning brings the stone profile, scale, color, transitions, and finishing pieces into one clear design so the finished work looks intentional from every angle.
For homeowners across the Shenandoah Valley, that planning often starts with a simple question: where will stone make the greatest difference? A full façade creates a different impression than a chimney surround or entry column. The right answer depends on the home’s architecture, its setting, and the features you want people to notice first.
Start Veneer Project Planning With the Right Scope
Stone veneer does not need to cover every exterior wall to make an impact. In fact, a targeted application often produces the most balanced result. A fieldstone chimney can add texture to a traditional home. Stacked stone at the front entry can define a newer home with clean lines. Ledge stone along a foundation can give a low, wide elevation more visual weight.
Walk to the street and look at the house as a whole. Identify the architectural elements that already create natural focal points: the front door, chimney, garage bump-out, porch columns, gables, or a prominent foundation wall. Stone is especially effective when it supports those features rather than competing with them.
It also helps to consider what the home needs functionally. A renovation may call for veneer to cover a damaged or mismatched masonry surface. A new build may need a coordinated material plan before siding, trim, roofing, and landscaping are finalized. A smaller curb-appeal project may focus on columns, a mailbox surround, or an entry wall. Each has a different budget, quantity requirement, and installation sequence.
Choose a Stone Profile That Fits the Home
Manufactured stone veneer offers a wide range of shapes and textures, from rough field stone to linear ledge stone and tightly layered stack stone. Selecting a profile is not simply a matter of choosing the most attractive sample. The stone should feel appropriate for the architecture and the scale of the area being covered.
Field stone tends to bring a more natural, traditional appearance. Its irregular shapes work well on chimneys, broad façades, and homes with rustic, farmhouse, or mountain-inspired character. Cut stone has a cleaner, more formal look and can suit colonial, craftsman, and transitional designs. Ledge stone emphasizes horizontal lines, making it a strong choice for foundations, retaining features, and long wall sections. Stack stone creates a more contemporary, structured finish and is often effective around fireplaces, entries, and accent walls.
Color matters just as much as profile. View samples alongside the materials that will remain in place, including siding, brick, roof shingles, window trim, and doors. A stone blend can look warm indoors or in a showroom but read much cooler in full daylight. In the Shenandoah Valley, natural surroundings also play a role. Homes set against wooded lots, open farmland, or mountain views often benefit from tones that feel grounded in the landscape rather than overly sharp or artificial.
A sample should answer practical questions as well as aesthetic ones. Does the stone have enough variation for a large chimney? Will its texture overwhelm a narrow column? Does the color complement the roof without matching it too closely? The goal is contrast with harmony, not a collection of materials competing for attention.
Measure More Than the Main Wall Area
Accurate measurements keep an estimate realistic and help prevent frustrating material shortages. Measure the height and width of each surface, then calculate the square footage. For walls with windows, doors, or large openings, record those dimensions too. Openings are generally subtracted from the main area, but their corners, edges, and surrounding details can still affect the amount of accessory material needed.
Corners deserve particular attention. Outside corners require corner pieces, which create the appearance of full-bed stone wrapping naturally around the edge of a wall or column. A project with multiple returns, bump-outs, columns, or chimney corners may need a different material mix than a large flat wall with the same total square footage.
Do not overlook the areas where stone begins and ends. A veneer section may terminate at siding, brick, stucco, trim, or grade. Those transitions need to be planned so the installation looks crisp and protects the wall assembly. If the stone meets the ground, steps, a roofline, or a porch deck, those details should be considered early rather than handled as an afterthought on installation day.
For complex elevations, photos and rough sketches are useful. They help clarify wall dimensions, corner conditions, openings, and the relationship between stone and adjacent materials. Builders and masons benefit from the same preparation, especially when the project includes several stone applications across one property.
Plan the Details That Make Stone Look Complete
The difference between a good veneer installation and a polished architectural result often comes down to the finishing components. Stone may cover the main wall beautifully, yet still feel unfinished if caps, keystones, address numbers, or transitions were not selected as part of the original design.
A wall cap gives a freestanding garden wall or entry feature a deliberate top edge. Pier caps provide a finished crown for masonry columns. Keystones can bring definition to an arch, entry, or window surround. Coordinated street numbers make a stone mailbox, column, or entry feature feel designed for the property instead of added later.
These pieces should relate to the selected veneer in color, texture, and proportion. A substantial cap can look right on a wide pier but too heavy on a slim column. An ornate keystone may complement a formal façade yet feel out of place on a modern stack stone design. This is where restraint matters. A few well-chosen details are more effective than trying to add a decorative feature everywhere stone appears.
Interior projects deserve the same attention. A fireplace veneer should be planned with the mantel, hearth, television location, lighting, and adjacent flooring in mind. Stone can create a dramatic focal point, but the proportions around it determine whether it feels inviting or crowded. Confirm clearances and installation requirements before materials are selected, particularly around fireplaces and heat-producing appliances.
Coordinate the Installation Sequence
Veneer work is closely connected to other parts of a construction or remodeling project. On an exterior, flashing, weather-resistive barriers, lath, drainage provisions, and substrate preparation need to be correctly addressed before the first stone is installed. On a new build, this means coordinating with the builder’s schedule. On a remodel, it may mean resolving existing siding, sheathing, or masonry conditions before veneer begins.
The right sequence depends on the application. A chimney remodel may require demolition and repair before stone selection is finalized. Porch columns may need their dimensions confirmed before caps are ordered. A foundation project may need grading, landscaping, or hardscape work coordinated so the veneer terminates at the correct height.
There is also a budget trade-off to consider. Expanding stone across more square footage can create a larger visual statement, but it may leave less room for the finishing details that make the work look complete. In many cases, a focused installation with matching caps or a thoughtfully finished entry delivers more value than covering one additional wall without resolving the transitions.
Build a Plan Around the Home, Not a Trend
Popular stone styles can provide useful inspiration, but a home should not be forced into a look that does not suit its architecture. A traditional Shenandoah Valley home may call for the texture and variation of field stone, while a newer home may benefit from the clean lines of cut stone or stack stone. The best choice is the one that will still look right when the trend has passed and the landscaping has matured.
Before ordering, review the full composition: stone profile, color blend, installation areas, corner needs, transitions, and finishing pieces. This gives homeowners, builders, and installers a shared direction and reduces last-minute decisions that can weaken the design.
Grizzly Stone helps turn those early ideas into custom-made stone selections for façades, chimneys, foundations, accent walls, columns, and the details around them. When every piece is considered together, stone veneer becomes more than a surface upgrade. It becomes a lasting part of what makes the house feel like home.