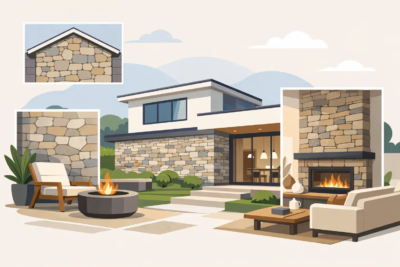

A well-planned stone column installation can change the first impression of a property before anyone reaches the front door. At an entry, driveway, porch, or gate, columns add scale and permanence. They can also tie together a stone foundation, chimney, retaining wall, or front façade so the home feels designed as a whole instead of updated one feature at a time.
The strongest results do not start with choosing a color from a sample board. They start with proportion, sound construction, and a clear plan for how the stone, cap, and surrounding architecture will work together. Whether you are finishing a new build in the Shenandoah Valley or improving a dated exterior, those early decisions determine whether a column feels like it belongs.
Start With the Column’s Job
Before selecting veneer, decide what the column is meant to do. A front porch column may be structural, decorative, or a combination of both. A freestanding pier at a driveway entrance may support a gate, hold lighting, display house numbers, or simply frame the approach. The requirements change with the application.
A structural column needs an engineered load path from the roof or beam above down to a properly sized footing. Stone veneer is the finish, not the support system. Decorative columns still need stable construction, especially when they are tall, exposed to wind, or topped with a substantial cap, lantern, or mailbox.
This distinction matters because a beautiful veneer installation cannot correct a weak base. If there is any uncertainty about loads, footings, or existing conditions, involve a qualified builder, mason, or engineer before stone is ordered.
Get Proportion Right Before Stone Column Installation
Columns look best when their dimensions relate to the house. A narrow stone pier beside a broad two-story façade can disappear. An oversized column on a modest porch can feel heavy and block natural light. There is no single correct measurement, but the column should have enough visual weight to support its role.
For porch work, look at the width of the posts, the height of the railing, and the depth of the roof overhang. Many successful designs use a stone base with a simpler finished post above it. This approach brings texture and durability near the ground while keeping the porch open and appropriately scaled.
For entry piers and driveway columns, height should be considered from the street and the vehicle approach, not only from a close-up view. A cap and lighting fixture add visual height, while a wider base makes a column feel grounded. It often helps to mark the proposed footprint and height with stakes, boxes, or framing lumber before construction begins.
Build a Stable, Weather-Ready Base
The base beneath a stone column has to handle weight, moisture, and seasonal movement. In Virginia, freeze-thaw cycles and drainage deserve careful attention. Footings should extend below the local frost depth and rest on undisturbed soil or properly compacted material, according to the requirements of the project and local code.
A concrete masonry unit core is a common choice for freestanding stone columns. Depending on the design, the core may be reinforced and filled with grout. Framed porch columns require the proper exterior sheathing, flashing, and moisture-management details before veneer is applied. The exact assembly depends on whether the substrate is masonry, concrete, wood framing, or another approved surface.
Drainage should never be an afterthought. Water that gets behind the veneer needs a path out, and horizontal surfaces need to shed water away from the structure. Proper flashing, drainage material where required, and a cap with overhang all protect the work below. Skipping these details may not show immediately, but it can lead to staining, cracked mortar, or loose stone over time.
Choose a Veneer Profile That Fits the Architecture
Stone texture carries a great deal of visual weight on a small vertical feature. A column gives homeowners an opportunity to introduce a profile that complements the home without covering the entire exterior in stone.
A cut stone profile can create a tailored, architectural look that works well with brick, traditional siding, and refined entryways. Field stone brings a more natural, gathered appearance and suits homes that lean rustic or regionally inspired. Ledge stone emphasizes horizontal movement and can make a low porch base feel broader. Stack stone offers a more linear, contemporary texture, particularly effective on clean-lined new construction.
Color matters, but so does the range of color within the profile. If the home has warm brick, tan siding, or bronze fixtures, select stone with tones that support those materials rather than compete with them. On a white or light neutral exterior, deeper grays and mixed earth tones can give columns welcome definition. Requesting samples and viewing them outdoors at different times of day is worth the effort.
For a cohesive design, repeat the chosen stone in one or two other locations. A matching chimney base, foundation accent, retaining wall, or front-entry surround creates a clear visual connection. Repetition should be intentional, though. Too many unrelated stone applications can make a property feel busy.
Plan the Cap Before the Veneer Goes On
The cap is not a final accessory. It is an essential part of the column design and should be selected early enough to coordinate the finished dimensions. A properly sized cap extends beyond the face of the stone, creating a drip edge that helps keep water from running down the veneer.
The cap style also sets the tone. A smooth, substantial pier cap reads formal and clean. A split-face or textured cap can feel more rustic. On porch bases, a broader cap may transition beautifully to a finished wood or composite post above. On driveway columns, the cap must also accommodate any planned light fixture, wiring, gate controls, or address marker.
Coordinated architectural details make the difference between a stone feature and a finished entry. House numbers, keystones, wall caps, and pier caps should work with the same color family and level of formality. Grizzly Stone helps homeowners and professionals consider these pieces together, which avoids the mismatched look that often comes from choosing finishing materials at the end.
Installation Details That Separate Good Work From Shortcuts
Once the structure, veneer, and cap are settled, workmanship becomes visible in the layout. The installer should establish level courses where the stone profile calls for them, distribute colors naturally, and avoid obvious repetition. Corners deserve special care because they frame the column from nearly every approach.
For manufactured stone veneer, the substrate and fastening system must follow the product specifications and applicable building requirements. That can include a weather-resistive barrier, metal lath, scratch coat, mortar bed, and properly prepared corner pieces. Masonry substrates may use a different installation method. The right process depends on the system, so the material instructions should guide the work rather than habit alone.
Mortar joints should complement the stone rather than overpower it. A tight, recessed joint can emphasize individual stones. A fuller grout joint can create a more traditional, masonry-forward appearance. Neither is automatically better. The correct choice depends on the profile and the character of the house.
Do not rush the final cleanup. Mortar haze, smeared faces, poorly trimmed edges, and uneven caulking are especially noticeable on columns because people see them up close. Clean transitions at the cap, base, adjacent siding, and railings are part of the finished craftsmanship.
Common Design Mistakes to Avoid
The most frequent mistake is treating columns as isolated objects. A gray stack stone may look appealing in a showroom, yet feel out of place beside a warm, traditional brick home. The solution is to evaluate the entire elevation: roof color, siding, trim, hardscape, doors, and existing stone or brick.
Another common issue is undersizing the cap or failing to slope it for drainage. Water should not sit on the top of a column or run directly down its face. Lighting can cause trouble, too. If a fixture is planned, rough-in the electrical work before the stone is installed and confirm that the cap and fixture proportions work together.
Finally, avoid using stone simply because a column is available to cover. A thoughtfully proportioned painted post may be the better choice for some porches. Stone earns its place when it adds grounding, texture, and a connection to the larger home design.
A stone column should feel settled into the property, as though it was always part of the plan. When the structure is sound, the proportions are right, and the veneer and finishing pieces speak the same design language, that small architectural detail can make the entire home feel more complete.