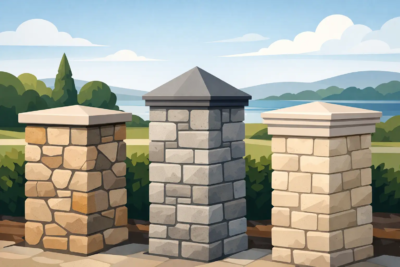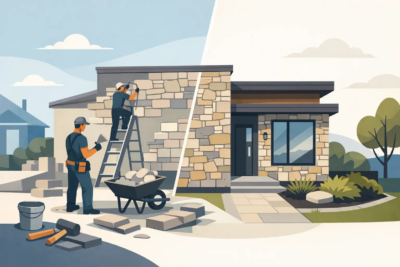

A stone veneer project can change the character of a plain foundation, chimney, entry, or interior wall. But the finished stone is only as dependable as the surface behind it. Knowing how to prepare veneer walls before mortar is mixed protects the investment in your home and gives the stonework the clean, lasting appearance it deserves.
For Shenandoah Valley homes, preparation matters even more on exterior projects. Wind-driven rain, seasonal freeze-thaw cycles, and the transition between stone and siding or trim all put pressure on the wall system. A thoughtful start prevents the issues homeowners notice later: loose stone, cracked joints, staining, or water finding a path behind the veneer.
Start With a Sound, Clean Wall
Before selecting the first stone, inspect the wall as a building surface, not simply a backdrop. The framing, sheathing, masonry, or concrete must be solid, stable, and free of conditions that could compromise adhesion. Repair soft or damaged sheathing, loose masonry, active cracks, and deteriorated mortar before continuing.
Exterior walls should also be checked for signs of existing moisture trouble. Peeling paint, rot at the bottom of a wall, rusted fasteners, or stains near windows and rooflines are not problems stone veneer should cover up. Find the source first. It may be a missing kick-out flashing, an overflowing gutter, failed caulk around a penetration, or poor grading that keeps water against the house.
For an interior accent wall, the concern is usually less about weather and more about stability and surface condition. Remove loose wallpaper, flaking paint, grease, dust, and anything else that prevents a reliable bond. A decorative veneer installation is not the time to assume an old wall is sound because it looks flat from across the room.
Match the Preparation to the Wall Type
There is no single preparation method for every veneer wall. A wood-framed exterior wall, a poured concrete foundation, and a painted interior masonry wall each call for different steps. The stone profile and installation system also matter. Field stone, ledge stone, stack stone, and cut stone can create very different visual effects, but each needs a properly prepared backing.
Wood-framed exterior walls
On a typical framed wall, the work begins with approved exterior sheathing and a correctly installed weather-resistive barrier. This layer is part of the wall’s moisture-management system. It must be lapped in the proper direction so water sheds outward, with careful detailing around windows, doors, corners, and transitions to other claddings.
Adhered manufactured stone veneer commonly requires corrosion-resistant metal lath or an approved alternative over the barrier. The lath needs to be fastened securely into framing or according to the applicable wall assembly requirements, not casually attached where it may pull loose under the weight of the stone and mortar. A properly applied scratch coat then creates the textured base that helps the setting bed hold.
Flashing is equally important. Install it where water needs a clear exit: above the top of veneer sections, at horizontal transitions, around openings, and where a roof or deck intersects the wall. At the bottom, a weep screed or approved drainage detail allows incidental moisture to escape rather than collect behind the stone.
Concrete, CMU, and masonry walls
Sound, clean, unpainted concrete or concrete masonry units may be suitable for a direct application system, depending on the product requirements and wall condition. The surface must be free of dust, efflorescence, form-release residue, loose mortar, and paint that could interfere with the bond.
Older masonry often needs more attention than new construction. Rake out and repair failed joints, remove unstable coatings, and address cracks that suggest movement. If the wall is damp or has persistent white mineral deposits, resolve the moisture source before adding veneer. Stone will improve the appearance of a wall, but it cannot correct water pressure or foundation drainage problems.
Interior walls and fireplaces
Interior veneer can be more forgiving from a weather standpoint, but it still requires a compatible substrate. Drywall may need an approved lath-and-scratch-coat assembly or another manufacturer-approved preparation method. Around fireplaces, follow clearance, substrate, and firebox requirements exactly. Heat, movement, and combustible materials make fireplace work a poor place for shortcuts.
Plan the Details Before You Cover the Wall
The best stone installations look intentional at every edge. Before preparation begins, decide where the veneer starts and stops, how it meets siding or brick, and which finishing pieces will complete the design. Corners, sills, caps, keystones, and architectural accents should be considered early, not treated as last-minute additions.
Lay out the wall so the proportions work with the home. A full-height entry feature may call for stone that wraps around a corner, while a foundation treatment may need a clear termination line beneath siding. On a chimney, account for flashing and the relationship between the stone, roofline, and cap. These choices affect both appearance and the wall’s ability to shed water.
It also helps to order enough material from the selected profile and color blend to complete the job. Veneer stone has natural variation by design. Mixing pieces from several boxes or pallets during installation produces a more balanced result than installing one batch at a time. Planning for cuts, corners, and waste avoids a rushed search for matching material once the wall is underway.
Set Up the Work Area for Better Results
Preparation includes the jobsite. Protect landscaping, windows, porches, and finished surfaces from mortar splatter. Stage stone close enough to work efficiently without piling it where it creates a safety hazard or blocks access. If the wall is high, use stable scaffolding rather than trying to stretch from a ladder with a heavy stone in one hand.
Gather the materials required by the selected veneer system before beginning. That generally includes the approved weather barrier, flashing components, lath where required, fasteners, mortar, and tools for mixing, cutting, leveling, and cleaning. Using a mortar specified for manufactured stone veneer is not a minor detail. The mix needs the right working properties and bond strength for the application.
Weather affects exterior installation as well. Avoid applying mortar to frozen surfaces, working through heavy rain, or setting stone on walls that are excessively hot and dry without following proper moisture and curing practices. In Virginia’s changing seasons, a good installation schedule is part of good preparation.
Common Preparation Mistakes to Avoid
The most expensive mistakes happen behind the stone, where they are harder to see and repair. Covering damaged sheathing, skipping flashing, installing lath loosely, or applying veneer over a dirty painted surface can turn a beautiful upgrade into a future repair project.
Another common issue is treating every wall like a masonry wall. Direct bonding may be appropriate for certain clean, sound masonry substrates, but it is not automatically appropriate over framed construction or coated surfaces. The correct assembly depends on the existing wall, the veneer product, local building requirements, and the manufacturer’s installation instructions.
Finally, do not overlook transitions. Water often enters at the top edge of veneer, beside windows, at roof-to-wall intersections, and where stone ends against another material. Those details deserve as much attention as the stone pattern itself.
When Professional Preparation Makes Sense
A homeowner can assess a small interior feature and handle basic planning, but exterior veneer often involves water management, structural loading, cutting, and code-sensitive details. Chimneys, retaining walls, foundations with drainage concerns, and multi-story applications are especially good candidates for an experienced installer.
For builders and remodelers, early coordination also prevents design compromises. Selecting the stone profile, corner pieces, caps, and related architectural details before framing and exterior finishes are finalized makes the installation more efficient and more cohesive. Grizzly Stone works with homeowners and trade professionals throughout the Shenandoah Valley to help turn a stone idea into a finished architectural feature with the right materials behind it.
A well-prepared wall rarely calls attention to itself, and that is the point. It lets the texture, color, and craftsmanship of the veneer take center stage for years to come.