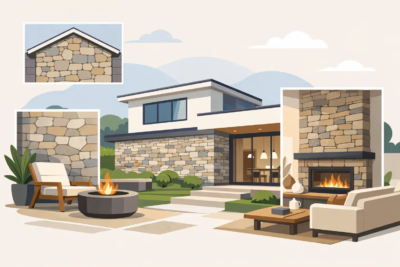

A bare concrete foundation can make an otherwise beautiful home feel unfinished. Stone veneer for foundation walls gives that lowest, most visible portion of the exterior real architectural weight, tying the house to the landscape while creating a more polished transition from grade to siding, brick, or stucco.
For homes across the Shenandoah Valley, this detail often carries more impact than homeowners expect. A foundation facing the driveway, front walk, patio, or sloping yard is constantly in view. Covering it with a well-chosen manufactured stone profile can turn a plain elevation into a home with presence.
Why Foundation Stone Changes the Whole Exterior
Foundation veneer works because it creates a visual base. Traditional masonry homes were often built with a substantial stone or brick foundation, and that sense of permanence still appeals today. Even on a newer home, manufactured veneer can introduce the depth, texture, and grounded character associated with natural stone construction.
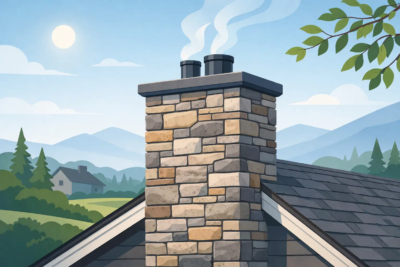
The best results are rarely about adding stone everywhere. They come from using it with intention. A foundation wrapped in stone can anchor lap siding above it. It can make a front porch look more established, connect a chimney to the rest of the façade, or give a rear patio elevation the same level of finish as the front of the home.
It is also a practical curb-appeal upgrade. Foundation areas tend to collect dirt, show splashback, and reveal staining more readily than upper walls. A textured stone surface can make those everyday conditions less visually dominant than they are on plain painted block or exposed concrete. That does not eliminate the need for good drainage, but it does create a more forgiving and durable-looking finish.
Choosing Stone Veneer for Foundation Walls
The right profile depends on the home, its setting, and how much of the foundation is visible. A one-foot exposure beneath siding calls for a different approach than a walkout basement wall facing a backyard entertaining space. Scale matters as much as color.
Match the Stone to the Home’s Architecture
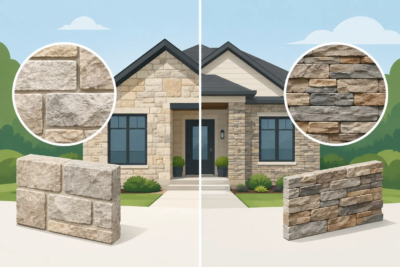
Fieldstone veneer brings an informal, natural character that suits farmhouses, mountain-influenced homes, and properties with wooded or rolling surroundings. Its varied shapes and fuller texture can make a foundation feel as though it belongs to the site.
Ledge stone offers a more linear appearance. It works well on homes with horizontal siding, wide trim, and long, low rooflines because its courses reinforce the home’s horizontal movement. Stack stone creates a clean, contemporary texture and can be especially effective on modern exteriors, porch walls, or sharply defined entry features.
Cut stone provides a more formal, tailored look. It is a strong choice for traditional homes, colonial-inspired designs, and projects where the foundation stone will coordinate with keystones, caps, or other architectural details. The goal is not to force one profile onto every house. It is to select a stone that feels proportionate to the home’s existing lines.
Think Beyond the Sample Board
A small sample is useful, but foundation stone is seen across a broad area and under changing light. Colors can look warmer in late afternoon, cooler on shaded sides of the house, and more pronounced after rain. Consider the roof, siding, trim, window frames, hardscaping, and nearby soil before settling on a blend.
For many Shenandoah Valley homes, earth-toned grays, soft browns, muted buffs, and balanced blends offer flexibility across seasons. A foundation does not need to match every exterior color exactly. It should support the larger palette without competing with it.
Pay attention to contrast as well. A dark stone beneath very light siding can create a crisp, defined base. A softer blend with shared undertones creates a quieter, more traditional result. Neither approach is automatically better. The right choice depends on whether the home needs a strong architectural accent or a more cohesive, understated finish.
Start With Water Management, Not Stone
Stone veneer is a finish material, not a solution for moisture problems. Before installation, the foundation and surrounding grade should be evaluated for water movement. Downspouts should carry water away from the house, soil should slope away from the foundation, and any active cracks, leaks, or drainage issues should be addressed first.
This step matters because foundation walls live at the meeting point of rain, roof runoff, irrigation, snow, and soil. Veneer installed over a wall that is already taking on water may hide the symptoms temporarily while allowing the underlying problem to continue.
A qualified installer should also use the appropriate wall-preparation and moisture-management details for the substrate and local conditions. That can include a weather-resistive barrier, flashing, drainage plane, lath, mortar bed, and properly designed transitions at windows, doors, siding, and grade. Requirements vary by wall assembly and jurisdiction, so the installation should follow applicable codes and manufacturer specifications.
The lowest edge deserves special attention. Veneer should not simply disappear into soil or sit where standing water can wick into the wall assembly. Proper clearance, termination details, and grade planning protect both the appearance and the long-term performance of the project.
Plan the Edges Before Installation Begins
The details at the corners and transitions are what make stone veneer look built into the home rather than added afterward. Before ordering material, decide where the stone begins and ends.
A full foundation treatment may wrap around all visible elevations, stopping at logical corners or changes in material. On another home, a front-facing foundation section may pair with stone columns, a chimney, or a porch skirt. If only one portion receives veneer, use an intentional termination line that follows an architectural feature whenever possible.
Door openings, garage corners, steps, hose bibs, vents, electrical boxes, and utility penetrations all need a plan. It is far easier to account for these elements before installation than to make awkward cuts or last-minute adjustments after the wall is underway.
Finishing pieces help here. Coordinated caps can complete low walls and porch piers, while architectural keystones and address numbers can reinforce the stone selection at an entry. Used thoughtfully, these details make the exterior feel designed as one composition rather than assembled from separate upgrades.
Avoid the Most Common Foundation Veneer Mistakes
The most frequent mistake is choosing a stone profile that is too busy for a small exposed foundation band. Large, highly varied stones can overwhelm a narrow area, particularly below a simple siding exterior. In that case, a more linear ledge profile or a restrained cut stone may deliver a cleaner result.
Another mistake is treating color as the only decision. Texture, joint treatment, stone size, and edge details all influence the finished look. A color blend that looks right in a photograph can still feel out of place if the profile does not suit the house.
Homeowners should also avoid using stone to disguise structural or moisture issues. Veneer can transform appearance, but it cannot repair a shifting foundation, correct poor drainage, or replace missing flashing. Address the building conditions first, then invest in the finish.
Finally, do not overlook proportion. If the foundation is visible on one elevation but nearly hidden on another, the design may need to adapt rather than follow a rigid wrap-everything approach. A custom plan can concentrate stone where it will be seen and where it creates the greatest architectural value.
Make the Foundation Part of a Larger Design
A foundation project can stand on its own, but it often becomes the starting point for a more cohesive exterior. Stone on the base of the house may lead naturally to matching porch columns, a chimney surround, an entry wall, or a landscape feature. The key is repetition without overuse.
For example, a home with fieldstone on a walkout basement foundation may use the same blend on a nearby retaining wall or outdoor kitchen. A house with refined cut stone at the front foundation might carry that material onto the porch piers and use a coordinating cap to finish the walls. Those repeated elements create continuity from the street to the front door.
At Grizzly Stone, the focus is not simply on selecting a stone profile. It is on helping homeowners and building professionals create an exterior that looks considered from every angle. A foundation is often the right place to begin because it gives the entire home a stronger base.
Before choosing a final blend, stand back from the house at the driveway and from the sidewalk or road. Notice which walls are most visible, where water travels after a storm, and which existing features deserve to be tied together. A well-planned stone foundation does more than cover concrete – it gives the home a finished place in its landscape.