
A hairline crack across a stone-faced chimney or entry column can draw your eye from across the driveway. Veneer stone cracking is not always a sign that the entire installation has failed, but it is a signal worth reading correctly. The location, direction, width, and timing of a crack can help distinguish a manageable mortar repair from movement that needs a qualified mason’s attention.
Manufactured stone veneer is designed to give a home the texture, depth, and lasting character of natural stone without requiring full-bed structural masonry. It performs beautifully on facades, foundations, chimneys, columns, and interior walls when the wall system behind it is sound and the installation details are right. When cracks appear, the stone itself is often only showing stress that began elsewhere.
What veneer stone cracking can tell you
Not every visible line is a crack in the veneer. A break may run through a mortar joint, through the face of an individual stone, along the edge of a window, or where the stone meets another material. Each pattern points toward a different possible cause.
Fine cracks limited to mortar joints can result from normal shrinkage, minor seasonal movement, or aging mortar. These may be largely cosmetic, particularly when they are isolated and have not widened. A crack that steps through multiple mortar joints, follows a diagonal path from a window or door corner, or continues into nearby siding, drywall, or brick deserves closer review. That pattern can indicate wall movement, foundation settlement, or a framing issue rather than a simple veneer concern.
Pay attention to whether the crack is changing. Marking its ends lightly with a pencil, taking a dated photo, and checking it after periods of heavy rain, freezing weather, or seasonal temperature change can be useful. A stable hairline crack is different from one that opens, spreads, or begins allowing water behind the stone.
The common causes of cracking in stone veneer
Movement in the structure or substrate
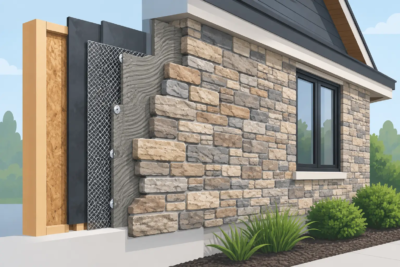
Stone veneer is a finish layer. It depends on a stable, properly prepared backing wall. If a foundation settles, framing shifts, or a wall flexes, that movement can transfer through the weather-resistive barrier, lath, mortar bed, and veneer.
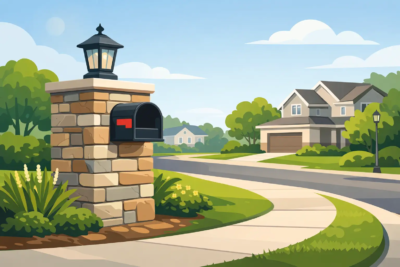
This is especially relevant around additions, tall chimney chases, porch columns, and transitions between different building materials. A newer addition can move differently than the original house as materials dry, settle, and respond to changing temperatures. On a home in the Shenandoah Valley, seasonal swings and freeze-thaw cycles can make small existing weaknesses more visible over time.
Settlement-related cracking is not something to cover over and forget. Repointing the joint may improve the appearance temporarily, but the crack can return if the underlying movement continues. A mason, builder, or structural professional can help identify whether the issue is within the veneer system or the building itself.
Moisture entering behind the veneer
Water is one of the most persistent causes of masonry trouble. Veneer installations need a drainage path behind the stone so incidental moisture can escape rather than become trapped in the wall. Flashing, weep details, properly lapped weather-resistive barriers, and correctly sealed transitions around openings all work together to manage water.
When water repeatedly enters behind the veneer, it can saturate mortar and the backing system. In freezing weather, that moisture expands as it turns to ice. Repeated freeze-thaw pressure may loosen mortar, create spalling on stone faces, or contribute to cracks at vulnerable joints.
Look for clues beyond the crack itself: white mineral deposits, dark staining, soft or crumbling mortar, rust marks, dampness near interior walls, or cracks concentrated below windows and roof intersections. These signs suggest that water management should be addressed before cosmetic repairs begin.
Missing movement joints or poor transitions
Different materials expand and contract at different rates. Stone veneer, wood framing, concrete, metal flashing, and fiber-cement siding do not all move alike. Well-planned installations account for these transitions rather than locking every material together with rigid mortar.
Cracks sometimes develop where veneer meets a porch roof, a deck ledger, a window frame, an expansion joint in concrete, or a dissimilar cladding material. The repair may require a flexible, properly selected sealant at the transition instead of more mortar. Using the wrong material can create a neat-looking repair that cracks again with the next season of movement.
Installation details that need correction
A veneer system has layers that cannot be judged from the finished stone alone. Improper lath attachment, inadequate mortar coverage, weak corner treatment, poorly prepared substrate surfaces, or missing drainage details can all affect long-term performance. In some cases, individual stones may sound hollow when tapped or loosen before obvious cracking appears.
This does not mean every crack points to a poor installation. A single impact crack near a walkway, for example, may come from a lawn tool, ladder, or delivered material. But widespread cracking, recurring cracks in the same area, or stone that separates from the wall calls for a closer look at the installation system rather than a surface-only repair.
When a crack is cosmetic and when it is urgent
An isolated hairline crack in a mortar joint that remains dry and stable can often be repaired by removing loose material, preparing the joint correctly, and matching the existing mortar color and texture. Care matters here. A mismatched patch can be more noticeable than the original crack on a prominent front elevation or fireplace surround.
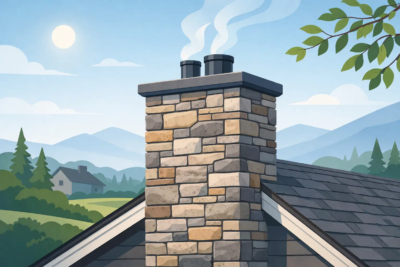
The situation becomes more urgent when stones are loose, cracked pieces are falling away, mortar is deteriorating in several areas, or the crack is admitting water. Cracks that are wider than a hairline, visibly growing, or paired with signs of movement elsewhere in the home should not be treated as a simple maintenance task. A chimney with cracking near the roofline deserves prompt evaluation because water exposure and height make small defects more consequential.
Interior veneer should also be examined in context. A crack on an interior accent wall may be minor, but one that appears with gaps at trim, sticking doors, or new drywall cracks can reflect broader movement in the structure.
A better approach to repair
The best repair starts by solving the cause, not selecting a mortar color. First, inspect the surrounding area for loose veneer, open joints, damaged flashing, failed caulk, roof runoff, and cracks in nearby materials. If water is involved, correct the source before rebuilding the affected section.
For a small, stable mortar-joint repair, a skilled mason can remove failed mortar without damaging adjacent veneer, pack the joint with compatible mortar, and finish it to blend with the existing work. If individual stones are damaged, replacement is often possible when a matching profile and color blend are available. Keeping a few extra pieces from the original project can make future repairs much easier.
Larger areas may require selective removal of the veneer so the backing layers, flashing, or drainage plane can be corrected. This is more involved than repointing, but it protects the investment in the rest of the wall. A proper repair should restore both the visual continuity of the stone and the wall’s ability to manage moisture and movement.
Avoid filling an active crack with rigid mortar, coating the entire wall with an unproven sealer, or pressure washing aggressively to hide staining. These shortcuts can trap moisture, damage mortar, and make a future repair more difficult. If sealing is appropriate for a particular project, it should be selected for the veneer system and applied only after the wall is dry and the source of moisture has been resolved.
Preventing cracks on a new stone project
Prevention begins before the first stone is set. Choose a veneer profile that suits the scale and architecture of the home, then make sure the installer follows the required wall-preparation, drainage, flashing, and fastening details for that system. The best-looking field stone, ledge stone, cut stone, or stack stone veneer still relies on the craftsmanship behind it.
Coordinate caps, keystones, trim, and transitions early in the design. A column cap that sheds water correctly and a properly detailed chimney transition do more than finish the look – they reduce opportunities for water to work behind the veneer. For homeowners planning an exterior upgrade, Grizzly Stone can help create a coordinated stone selection that supports a finished architectural result rather than a collection of disconnected accents.
A stone exterior should feel permanent, not fragile. When a crack appears, treat it as an opportunity to understand what the wall is asking for. A careful inspection and the right repair can preserve the character that made stone veneer part of your home’s design in the first place.